How to Accurately Measure and Install Cabinet Handles?
Have you ever noticed how clean cabinet handles seem to attract dirt and grime like magnets? I know I have! These little fixtures get touched constantly, making them a breeding ground for grease and germs. Keeping them clean isn’t just about appearances—it’s about hygiene too. Let’s make cleaning cabinet handles simple and effective.
Table of Contents
Key Takeaways
- Identify the material of your cabinet handles before cleaning to choose the right methods and avoid damage.
- Gather essential cleaning supplies like soft cloths, mild soap, and material-specific cleaners to ensure effective cleaning without scratches.
- Follow a simple step-by-step cleaning process, including regular maintenance, to keep your cabinet handles looking fresh and prolong their lifespan.
Identify the Handle Material
Why Knowing the Material is Important
Before you grab a sponge and start scrubbing, take a moment to figure out what your cabinet handles are made of. Trust me, this step matters. Different materials need different cleaning methods. What works for stainless steel might ruin wooden handles or tarnish brass ones. I’ve learned this the hard way—using the wrong cleaner can leave scratches or discoloration that’s tough to fix.
Knowing the material also helps you choose the right tools and products. For example, brass handles need gentle care, while stainless steel can handle a bit more elbow grease. Plus, understanding the material ensures your handles stay in great shape for years. After all, no one wants to replace handles because of avoidable damage, right?
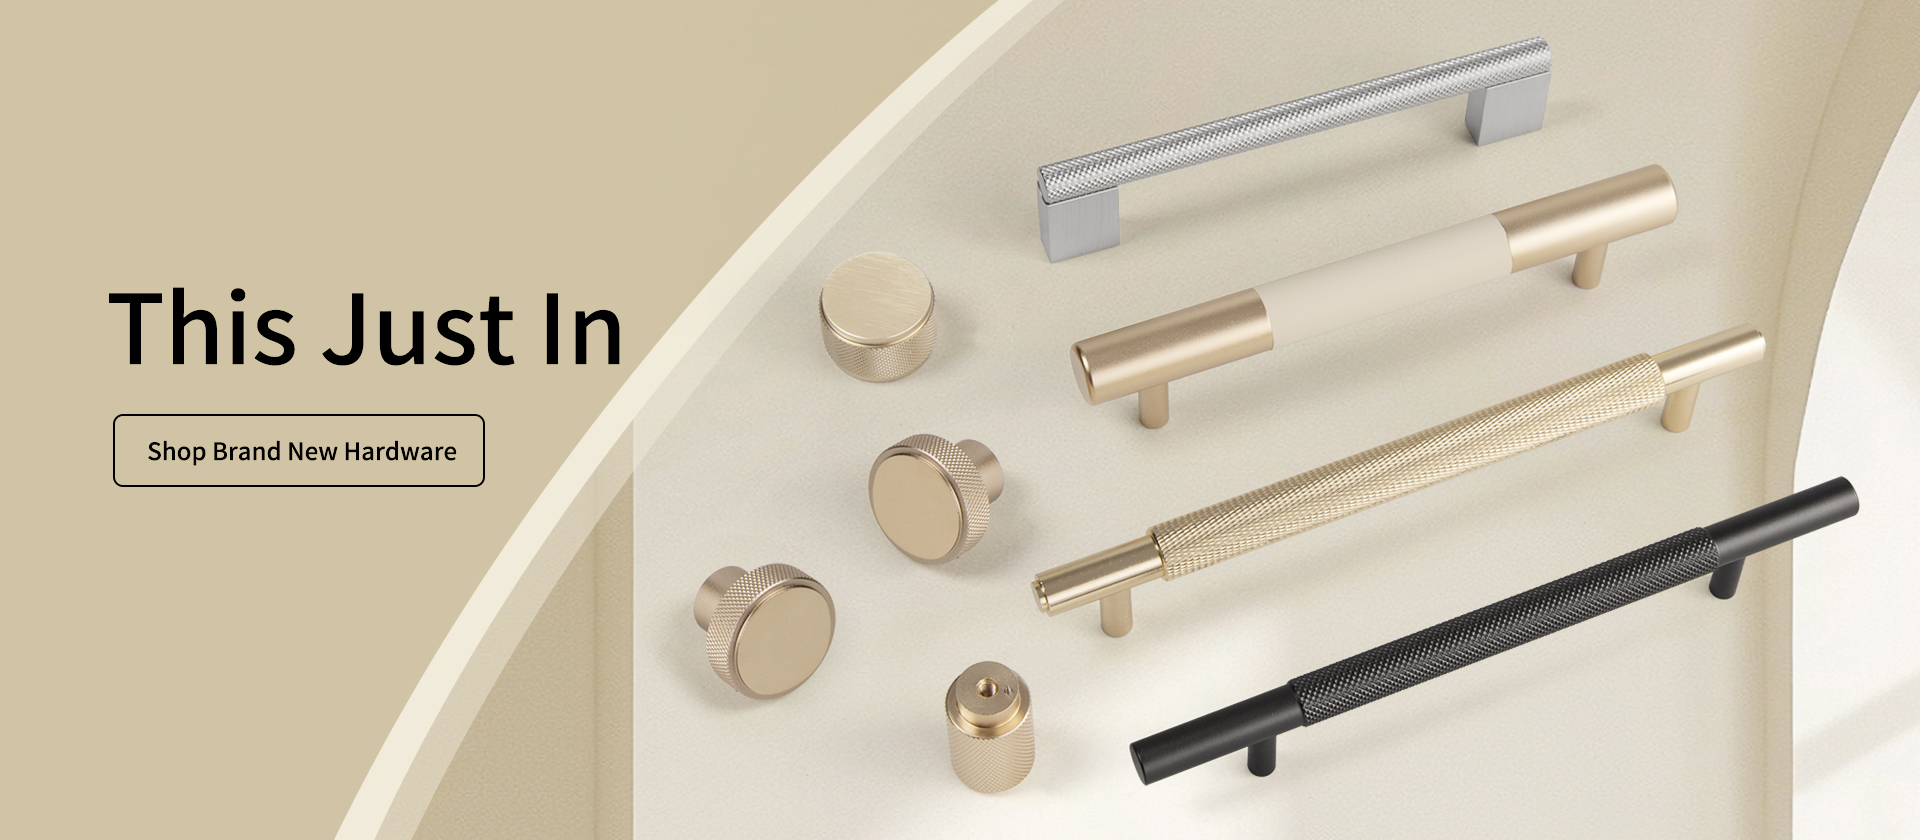
Common Materials for Cabinet Handles
Cabinet handles come in a variety of materials, each with its own charm and care requirements. Here’s a quick rundown of the most common ones:
Metal Handles: These include stainless steel, brass, bronze, and zinc. They’re durable and often easy to clean. Stainless steel, in particular, is non-corrosive and resists rust, making it a favorite for kitchens.
Wooden Handles: These add a warm, natural look but need extra care to avoid water damage.
Plastic or Acrylic Handles: Lightweight and affordable, but they can scratch easily.
Glass or Crystal Handles: These look elegant but require delicate cleaning to avoid chips or cracks.
Knowing the material also helps you choose the right tools and products. For example, brass handles need gentle care, while stainless steel can handle a bit more elbow grease. Plus, understanding the material ensures your handles stay in great shape for years. After all, no one wants to replace handles because of avoidable damage, right?
Here’s a handy table to help you understand the durability and maintenance of some popular metal handles:
Material | Durability | Maintenance Notes |
|---|---|---|
Solid Brass | Good | Requires gentle cleaning; avoid moisture exposure |
Bronze | Strong | Durable; can be shaped into various designs |
Stainless Steel | Excellent | Non-corrosive; does not rust |
Zinc | Moderate | Soft and malleable; flexible in design |
Take a closer look at your handles and match them to one of these materials. Once you know what you’re working with, you’ll be ready to clean cabinet handles the right way without worrying about damage.
Gather Supplies for Cleaning Cabinet Handles
Before diving into cleaning, let’s gather the right supplies. Trust me, having the proper tools and solutions makes the process so much easier and ensures you don’t accidentally damage your cabinet handles.
General Cleaning Tools and Solutions
For general cleaning, you don’t need anything fancy. Here’s a list of essentials I always keep handy:
Soft cloths: These are a must. I use them for wiping, polishing, and buffing. They’re gentle and won’t scratch surfaces.
Microfiber cloths: These are my go-to for tougher jobs. They’re amazing because they attract dirt and grease like a magnet. Plus, they’re lint-free and perfect for shiny surfaces like stainless steel or glass.
Mild dish soap: A few drops mixed with warm water work wonders for removing everyday grime.
Eco-friendly options: If you prefer natural solutions, try white vinegar, baking soda, or even lemon juice. I’ve also had great results with a coconut oil and baking soda mix (1 part coconut oil to 2 parts baking soda).
Non-abrasive sponge: This is great for scrubbing without scratching.
Pro Tip: Avoid abrasive tools like steel wool or sandpaper. They can leave permanent scratches on your handles.
Here’s why I love microfiber cloths:
Benefit | Description |
|---|---|
Surface Area | They clean more thoroughly due to their larger surface area. |
Electrostatic Charge | They attract dirt and grease with their positive electric charge. |
Scratch Resistance | They’re smooth and won’t damage delicate surfaces. |
Bacteria Removal | They remove up to 99% of bacteria, compared to cotton’s 30%. |
Material-Specific Cleaning Supplies
Different materials need different care. Once you’ve identified your handle material, grab these specific supplies:
Metal handles: Use a metal polish designed for your handle type. Apply it with a soft cloth in circular motions, then buff off the excess.
Wooden handles: A damp cloth with mild soap works best. Avoid soaking the wood to prevent damage.
Plastic or acrylic handles: Stick to mild soap and water. These materials scratch easily, so be gentle.
Glass or crystal handles: Use a glass cleaner or a vinegar-water mix. Wipe carefully to avoid streaks or chips.
Having the right supplies ensures you can clean cabinet handles effectively without causing damage. Trust me, it’s worth the extra effort to match your tools to the material.
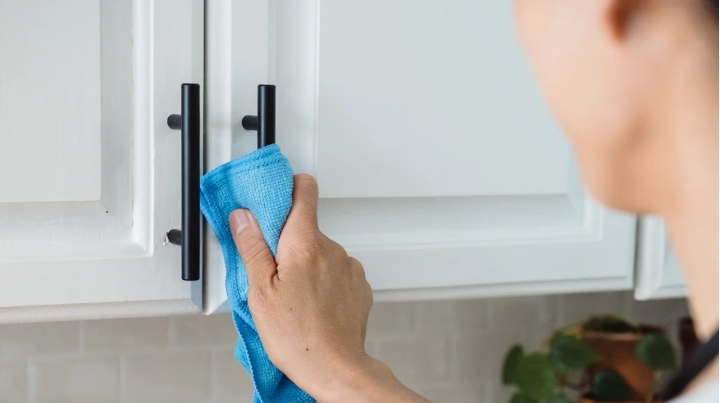
General Cleaning Instructions for Cabinet Handles
Step-by-Step Universal Cleaning Method
Cleaning cabinet handles doesn’t have to be complicated. I’ve found that following a simple, universal method works wonders for most materials. Here’s my go-to process:
Gather your materials: You’ll need a soft cloth or sponge, warm water, mild dish soap, baking soda, white vinegar, olive oil, and a toothbrush.
Optional step: If possible, remove the handles from the cabinets. This makes cleaning easier and ensures you don’t miss any hidden grime.
Prepare the cleaning solution: Mix a few drops of mild dish soap with warm water in a bowl.
Wipe down the handles: Dip a soft cloth or sponge into the soapy water and gently clean the handles.
Tackle tough stains: For stubborn grime, make a paste with baking soda and water. Use a toothbrush to scrub gently.
Rinse and dry: Wipe off any residue with a damp cloth, then dry the handles thoroughly to prevent water spots.
Polish for shine: Add a finishing touch by buffing the handles with a small amount of olive oil. This step restores their shine and adds a protective layer.
This method works for most materials and leaves your handles looking fresh and clean.
Pro Tip: Always test any cleaning solution on a small, hidden area first to avoid surprises.
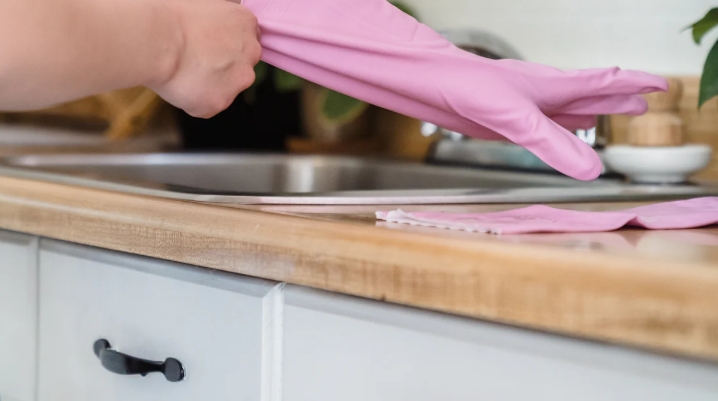
Tips to Avoid Damage During Cleaning
While cleaning cabinet handles, it’s easy to accidentally cause damage. I’ve learned a few tricks to keep them safe:
Avoid exposing handles to too much moisture. Metal can rust, and wood can swell or warp.
Stay away from abrasive tools like steel wool or sandpaper. These can scratch the surface.
Use soft cloths or sponges for cleaning. They’re gentle and effective.
Skip harsh cleaners like bleach, ammonia, or citrus-based products. These can discolor or weaken the material. Some examples to avoid include 409, Simple Green, and Clorox.
By following these precautions, you’ll protect your handles while keeping them spotless. Trust me, a little extra care goes a long way!
Material-Specific Cleaning Techniques
Cleaning Metal Handles
Metal handles are durable, but they can lose their shine if not cleaned properly. I’ve found that regular maintenance is key to keeping them looking great. Here’s what works best:
Wipe handles with a damp cloth regularly to remove fingerprints and smudges.
Use a cleaner designed for your handle’s metal type. For example, stainless steel cleaners work wonders on steel handles.
Avoid harsh chemicals or abrasive materials. These can cause corrosion or scratches.
I also recommend a quick wipe after cooking to remove grease. For a deeper clean, set a monthly schedule. If you’re replacing handles, consider stainless steel or zinc—they’re easier to maintain and resist rust.
Pro Tip: Polish metal handles with a small amount of olive oil to protect them and restore their shine.
Cleaning Brass Handles
Brass handles add a touch of elegance, but tarnish can dull their beauty. I’ve had great success using natural solutions like these:
Mix white vinegar and salt to create a paste. Apply it gently with a soft cloth.
Use lemon juice and baking soda for stubborn tarnish. The mild acidity dissolves oxidation without damaging the brass.
Rinse thoroughly and dry immediately to prevent water spots.
Tarnish forms when brass is exposed to air, so regular cleaning is essential. If left untreated, it can thicken and become harder to remove.
Quick Tip: Buff brass handles with a clean cloth after cleaning to bring back their warm glow.
Cleaning Chrome Handles
Chrome handles are all about that reflective finish. To keep them shiny, I follow these steps:
Wipe with a soft cloth dampened in soapy water. Dry immediately to avoid water spots.
For tougher grime, spray a vinegar-water mix, let it sit for a few minutes, and wipe clean.
Use a baking soda paste for stubborn spots. Apply, scrub gently, and rinse thoroughly.
For persistent stains, try a specialized chrome cleaner. Follow the instructions carefully.
Daily maintenance helps prevent build-up. I also polish chrome handles occasionally with a chrome-specific polish to keep them gleaming.
Cleaning Wooden Handles
Wooden handles need extra care to avoid damage. Here’s how I clean them safely:
Wipe with a soft, damp cloth to remove dirt. Avoid soaking the wood to prevent swelling.
Use a wood-specific cleaner or a vinegar-water mix for deeper cleaning. Stay away from abrasive cleaners or alcohol-based products.
Reapply a wood finish or oil occasionally to restore shine and protect the surface.
Wood handles bring warmth to any space, so it’s worth taking the time to care for them properly.
Note: Always dry wooden handles immediately after cleaning to prevent warping or discoloration.
Polishing and Maintaining Cabinet Handles
Restoring Shine to Handles
Restoring the shine on cabinet handles is easier than you might think. I’ve tried a few techniques, and these work like magic:
Use a metal polish designed for your handle’s material. Apply it with a soft cloth in small, circular motions. Then, buff off the excess polish with a clean cloth.
For a natural option, pour a little olive oil or baby oil onto a cloth. Gently buff the handles, following the grain if they have one. Wipe away any leftover oil with a fresh cloth.
These methods bring back that “like-new” sparkle. I love how a quick polish can make handles look brand new.
Pro Tip: Always test any polish or oil on a hidden spot first to ensure it doesn’t react poorly with the material.
Preventing Dirt and Grime Buildup
Keeping handles clean is all about staying ahead of the grime. Here’s what I do to prevent buildup:
After cooking or eating, I wipe down the handles with a damp cloth. It’s a small step that makes a big difference.
Once a month, I use a vinegar-water solution for a deeper clean. It keeps grime from sticking around.
Occasionally, I buff the handles with a light coating of mineral, olive, or lemon oil. This creates a protective barrier that repels dirt and slows tarnishing.
These habits save me time in the long run. Plus, they keep my handles looking fresh and clean every day.
Quick Tip: Don’t forget to dry the handles after cleaning. Moisture can lead to rust or discoloration over time.
Regular Maintenance Practices
Regular maintenance doesn’t have to be a chore. I’ve found that a little consistency goes a long way. Here’s my routine:
Wipe handles weekly with a soft, damp cloth to remove dust and fingerprints.
Polish metal handles monthly to maintain their shine.
Reapply wood oil or finish to wooden handles every few months to keep them protected.
By sticking to this schedule, I avoid deep cleaning marathons. My handles stay in great shape, and I don’t have to worry about replacing them anytime soon.
Note: If you notice scratches or tarnish, address them quickly. Small issues are easier to fix before they get worse.
Troubleshooting Common Handle Cleaning Issues
Removing Stubborn Stains
Stubborn stains can be frustrating, but they’re not impossible to tackle. I’ve dealt with everything from sticky grease to dried-on food, and here’s what works best:
Gather your tools: a soft cloth, warm water, mild dish soap, baking soda, and a toothbrush for detailed areas.
If possible, remove the handles. This makes it easier to clean every nook and cranny.
Mix a cleaning solution with warm water and a few drops of dish soap.
Wipe the handles with a soft cloth or sponge. For tougher stains, make a paste with baking soda and water. Apply it to the stain and scrub gently with a toothbrush.
Rinse thoroughly and dry the handles to prevent water spots.
Finish with a light polish using olive oil for a shiny, protective layer.
Pro Tip: Always test cleaning solutions on a hidden spot first to avoid surprises.
Dealing with Tarnish or Rust
Tarnish and rust can make handles look old and neglected. I’ve found a few tricks to restore their beauty:
For tarnish, rub gently with a baking soda paste. Let it sit for a few minutes, then scrub lightly with a toothbrush.
Rust spots? Apply the same paste to the rusted areas, let it sit, and scrub gently. Rinse and dry thoroughly to stop further rusting.
If the metal starts to wear through, it might be time to replace the handles.
Quick Tip: Regular cleaning prevents tarnish and rust from forming in the first place.
Fixing Scratches or Surface Damage
Scratches can be annoying, but they’re often fixable. Here’s what I do:
Use a metal polish designed for your handle’s material. Apply it with a soft cloth, rubbing in circular motions. Buff off the excess with a clean cloth.
Avoid abrasive tools like steel wool. They can make scratches worse.
For wooden handles, reapply a wood finish or oil to mask minor scratches and restore the surface.
Note: Always use soft cloths for cleaning or polishing to avoid causing more damage.
With these tips, you can handle any cleaning challenge like a pro!
Cleaning cabinet handles doesn’t have to be complicated. With the right steps and materials, it’s easy to keep them spotless and looking their best. Regular maintenance offers so many benefits:
It keeps your handles visually appealing.
It protects them, making them last longer.
It ensures they work properly and prevents future issues.
I’ve found that a little effort goes a long way. Got any cleaning tips or questions? Share them in the comments—I’d love to hear from you!
FAQ
How often should I clean my cabinet handles?
I recommend cleaning them weekly. Regular cleaning prevents grime buildup and keeps your handles looking fresh. For high-traffic areas, consider wiping them down daily.
Can I use vinegar on all handle materials?
Nope! Vinegar works great for metal and glass but can damage wood or certain finishes. Always test it on a hidden spot first to be safe.
What’s the best way to remove sticky residue?
Use a mix of baking soda and water to create a paste. Apply it gently with a soft cloth or toothbrush, then rinse and dry thoroughly.
Pro Tip: Avoid harsh chemicals—they can damage the finish!