How to Clean Cabinet Handles the Right Way
Installing cabinet handles may seem simple, but accuracy is crucial to achieving a beautiful result. Whether you are renovating your kitchen or upgrading your bathroom cabinets, correctly measuring and installing the handles will ensure that they are both functional and beautiful. In this guide, I will walk you through how to accurately measure and install cabinet handles to ensure a perfect fit every time. I know that it can be a bit overwhelming for a first-time DIY, so I will break down what you need to do one by one so that you can have an easy and enjoyable first DIY project!
Tools You Need
Before you get started, make sure you have the right tools. Here are the tools you need:
- Tape measure – for measuring the distance between the holes and the length of the handles.
- Screwdriver or drill – for securing the handles.
- Level – to ensure the handles are installed straight.
- Pencil – for marking the exact location.
- Template – optional, but helps to simplify measurements.
- Drill bit – the same size as the screws.
Making sure you have all these tools will help you complete the installation more efficiently and ensure the handles are installed accurately.
Cabinet handle installation location
It is very important to choose the right location to install cabinet handles, which not only affects the appearance, but also the convenience of use. Different types of cabinets have different handle installation locations. Here is a guide for common cabinet installations:
Drawer cabinets:
Drawer handles are usually installed in the center of the drawer front, about 2.5 to 3 inches (about 6 to 7.5 cm) from the top or bottom of the drawer. Make sure the center of the handle is aligned with the center line of the drawer to maintain beauty and symmetry.
Floor-standing cabinets:
For floor-standing cabinets, the handle should be installed in the center of the door, about 4 to 5 inches (about 10 to 12 cm) from the edge of the door. If it is a double-door cabinet, consider installing the handle on the center line of the door to maintain symmetry.
Wall-mounted cabinets/units:
The handle position of wall-mounted cabinets or units should usually be installed in the center or slightly above the door. For taller cabinet doors, the installation position can be slightly higher for easier grip. For the drawers of the unit, it is recommended to follow the same method as the drawer cabinet to ensure symmetry and comfort.
No matter what kind of cabinet, make sure the position of the handle is consistent with usage habits and the overall design style.
How to Install Cabinet Handles
Once you have determined the mounting location, the next step is the actual installation steps. Here is the step-by-step installation process:
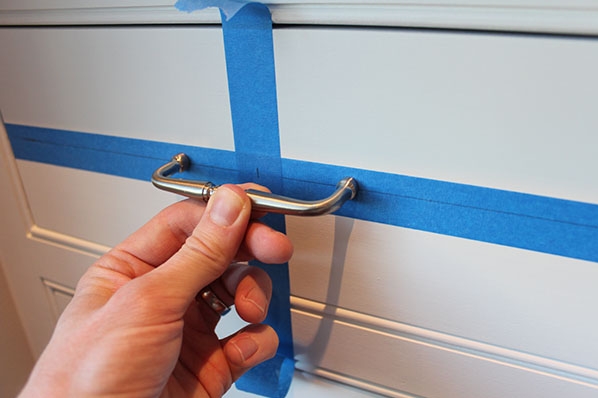
Step 1: Measure and Mark
How do I measure the correct location for cabinet handles?
Accurate measurements are the foundation for successfully installing handles. First, measure the distance from the cabinet door or drawer face to the center of the handle mounting hole.
For handles: Measure from the top edge of the drawer (or the top edge of the cabinet door) to the center of the mounting hole.
For knobs: Measure from the edge of the drawer or door to where you want the knob to be, usually about 2.5 to 3 inches from the edge.
Lightly mark these locations with a pencil. Make sure the measurement locations are consistent on all doors or drawers to maintain a consistent design.
Step 2: Drilling
How do I drill holes to install cabinet handles?
Once you have marked the locations, you can start drilling. Choose a drill bit that matches the screws. If you are using a template, you can place the template at the marked locations to ensure that the holes are drilled accurately.
For handles, you will need to drill two holes, the distance between the holes is the center-to-center distance you measured earlier.
For knobs, you only need to drill one hole at the marked location.
Before drilling, double-check the position to ensure the handle will stay straight once installed.
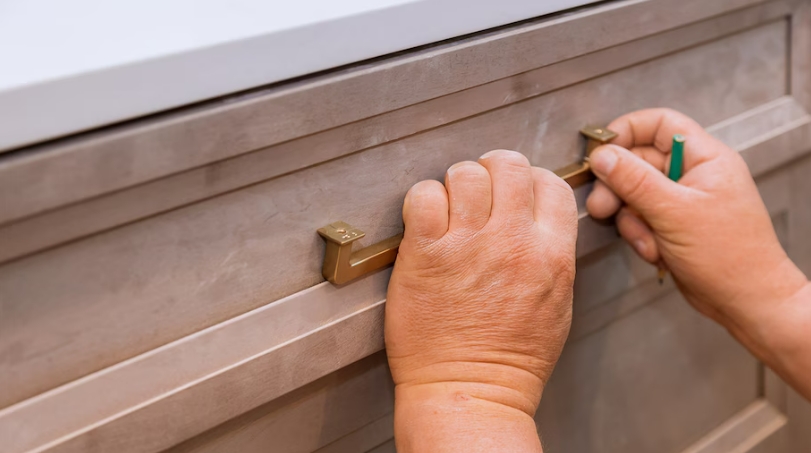
Step 3: Install Cabinet Handles
What is the final step in installing cabinet handles?
Once the holes are drilled, it’s time to install the handles. Position the handles over the drilled holes and insert the screws through the holes on the back. Use a screwdriver to tighten the screws to secure the handles. Be careful not to over-tighten them to avoid damaging the wood or surface.
If you’re installing a pull, make sure both screws are tightened evenly to ensure the handles stay straight. If it’s a knob, just make sure the screws are centered and the knob is flush with the surface.
Step 4: Final Check and Adjustment
After installation, step back and check the position of the handles. Are they straight? Are they secure? Use a level to check that the handles are installed straight. If necessary, you can loosen the screws slightly, adjust the position of the handles, and tighten them again.
Summary
Accurately measuring and installing cabinet handles may seem complicated, but with the right tools and some patience, everyone can do it. With these simple steps – measuring, marking, drilling, and installing, you can make your cabinet handles look beautiful and functional.
If you have any questions, or need additional assistance, please feel free to contact us. At [your company name], we specialize in providing high-quality cabinet hardware and are always available to provide advice or assistance with your installation. Feel free to contact us for more tips, product recommendations, or a quote.
FAQ
How do I measure for the correct mounting position of my cabinet handles?
When installing cabinet handles, first measure the distance from the edge of the drawer or cabinet door to the centre of the handle mounting hole. For drawers, it is usually recommended that the handle be mounted about 2.5 to 3 inches (about 6 to 7.5 cm) from the top or bottom. For floor-to-ceiling cabinets, the handle should be mounted in the centre of the door, approximately 4 to 5 inches (about 10 to 12 cm) from the edge of the door. Use a pencil to lightly mark the location, making sure that the markings are consistent from panel to panel or drawer to maintain the symmetry of the overall design.
How do I drill holes to install cabinet handles?
After marking the location, select a drill bit that matches the screws and begin drilling. For pull handles, two holes are usually required, with the distance between the holes depending on the centre-to-centre distance you measured earlier. For knobs, only one hole needs to be drilled in the marked position. Make sure you double check the position for accuracy before drilling to avoid deviations.
How do I make sure my cabinet knobs are firm and level after installation?
Once installation is complete, step back and check the level and stability of the handle. Use a level to confirm that the handle is straight. If necessary, loosen the screws slightly to fine-tune the position before tightening the screws to ensure the handle is securely mounted and level. Avoid over-tightening as this may damage the wood or surface.